It’s important for your website to load as fast as possible; users want to see your web pages quickly and if you can’t give them that - then they’ll go somewhere else. In this article, you’ll find a discussion on five simple and effective techniques for speeding up your web pages.
1. Use YSlow to profile and measure your website load times Knowing how long it takes for your website to load is the first step in determining what’s wrong. It also lets you know if you need to makes changes to your website to speed it up.Before we begin, if you haven’t installed YSlow, please do. It is a Mozilla Firefox extension which can be found at the following link:
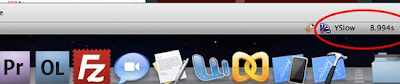
First, let’s navigate to the Six Revisions website so we are all working with the same example (just open it in a new tab or browser window).In the bottom right hand corner of your browser, there is a bar with a odometer (see Figure 1). Next to that bar, after the page has completely loaded, you will see ‘YSlow’ followed by a number. That number is the time it took for the site to load (in seconds) in your browser. We want that number to get this number as low as possible.
Most often, what causes such a long page load time is one or a combination of the following:
- Too many HTTP requests
- Uncompressed (or non-minified) JavaScript files
- No expiration headers for static graphic files
We’ll talk about all of this in a moment.
To familiarize yourself with the performance of site load times, travel around a few sites. Check out Google’s homepage, Facebook, and a few of your favorite blogs/sites and you will notice that the more images or JavaScript a site utilizes, the higher the page response time is.
 Figure 3: Performance tab shows you a letter grade (A, B, C, D, F) and a percent grade (1-100).
Aside from using a CDN (which can be costly) - everything else is doable.
Grading areasLet’s run through each grading factor. Here is a brief desciption of what each of these graded areas are, and ways to address them for optimum performance.
Make Fewer HTTP Requests:
HTTP requests happen whenever a web page requests a file from the server. These can range from scripts, CSS files, images, and asynchroneous client-side/server-side requests (Ajax and other variations of the technique).
This is the most crucial area when it comes to performance, and also one that is easily addressed with just a little bit of elbow grease. For example, caching files on the user’s machine often helps, as well as consolidating scripts, CSS, and images.
Add an Expires Header:
80% of the page load time is wrapped up in downloading scripts, images, and CSS. Most often, these elements don’t change on users’ machines. By adding some code to your .htaccess file you can cache the redundant files on the users local machine (we’ll discuss how to do this later down the article).
Gzip Components:
Gziping or compressing JS files, images, HTML documents, CSS files, etc. allows the user to download a much smaller version of a file, increasing the speed of the page load. This can reduce the tax on your server, but unzipping (uncompressing) the components can lead to slower page response times depending on the user’s browser.
Put CSS at the top:
Putting CSS files at the top of your document allows your site to render your web pages as soon as possible while other components such as images and scripts are still loading.
Put JS at the bottom:
With your CSS at the top of the document, inserting your JS files just before you close your
Avoid CSS Expressions:
I personally never use
CSS expressions (otherwise called Dynamic Properties), which is an IE-only, proprietary way of adding programming concepts (such as control/conditional structures) to CSS. As of IE8, Trident-based layout engines (which is used in IE) will no longer be supported, so it’s never a good idea to use them anyways. Rather, I script with PHP to
load different CSS style rules based on various conditions, be it a random number, time of day, or browser.
Make JS and CSS external:
Placing JS and CSS in external files allows your browser to cache them making your page load faster than those files loading inline every time the page is called.
Reduce DNS lookups:
Whenever a user types in a domain name in their web browser address field, the browser performs a DNS lookup to the IP address. The more locations your site has to access, the more DNS lookups that must occur. Do your best to keep these low, on average it takes 60-100 milliseconds to do a DNS lookup.
Minify JS:
Unlike regular gzip compression, minifing JavaScript files is removing the unnecessary spaces, tabs, and various other selected characters reducing the overall size of the file. With a smaller file your able to have a faster page load. You can use
JSMIN to minify your JavaScript.
:
No matter if you do a server-side header redirect, a JS redirect, or an HTML meta redirect, your site is going to load a header with a blank page, then load your new page, increasing the time it takes for a user to get to the actual page they want to go to - So completely avoid this at all costs.
Remove duplicate scripts:
Making your browser load the same script twice will increase your page load. It’s simple math. More files equals more load time. Double check your site and make sure your not calling jQuery 2 or 3 times or any script for that matter.Whew… that was a lot, let’s move on to the next tab of YSlow just before we get into some other techniques to increase the performance of your website.
 Figure 4: The Components tab.
The Components tab (Figure 4) gives you insight into what your efforts to increase your site speeds are producing. Here, you can see how long it takes for certain files to load, if those files are gziped, response times, as well as if they are cached in the users machine and when their cache expires. This is good for examining components of your site, measuring their performance and optimizing their speed.
Lastly, we have the Stats tab (Figure 5). This tab shows all the HTTP requests for both the downloaded files, as well as the cached files. The Empty cache shows the files the browser had to download in order to render the page. The Primed Cache, on the other hand, is the list of files that were already in the user’s browser cache, saving the browser from having to download those files again.
 Figure 5: Stats tab.2. Using CSS Sprites to reduce HTTP Requests
CSS Sprites may be the coolest thing since Tesla invented electricity… did I say that.. oops, I meant Edison. Well, not quite, but pretty close.CSS sprites can reduce your page load time simply by reducing the amount of HTTP requests your page makes to the server through the consolidation of your CSS background images.
Most tutorials teach you just to use CSS Sprites for navigation, where I am going to say to use it for the entire user interface of your site.First, let’s take a quick look at YouTube and how they use CSS Sprites (Figure 6). You can find YouTube’s CSS Sprite here:

What happens is, using CSS, YouTube set a class with this image as the background (pictured above).Then with elements that need to use these images, their class is set accordingly, with the background-position CSS property set to properly align the top and left sides in that element.Let’s give it a try. We are going to use the YouTube Image as an example.
In example below, we rendered the YouTube Logo to the screen. Using the same sprite class, and same image, we are going to create a simple rollover icon.
<style>
.sprite {
background:url(http://s.ytimg.com/yt/img/master-vfl87445.png);
}

#logo {
width:100px;
height:45px;
background-position:0 0;
}
</style>

<div id="logo" class="sprite"> </div>
Now what we’ve done is allowed for all of our static site assets to come from a single HTTP request, which significantly reduces page load. When you use hover with sprites it makes for a seamless transition, unlike when you load the file on the hover state, which leaves a blank space until that file is loaded.
 <style>
.sprite {
background:url(http://s.ytimg.com/yt/img/master-vfl87445.png);
}
#logo {
width:100px;
height:45px;
background-position:0 0;
}

#button {
background-position:0 -355px;
padding:5px 8px;
}

#button:hover{
background-position:-25px -355px;
}

</style>

<div id="logo" class="sprite"> </div>

<a href="#" id="button" class="sprite"></a>
3. Load your CSS first and your JavaScript lastWith some websites, you simply can’t get around all the HTTP requests, as it disrupts your functionality. So as an alternative, you can "bring out the appetizer" while the "main entree" is finishing up by loading the JavaScript files last.In that regard, here’s a couple of tips:
- Load your CSS in your
- Load your JavaScript just before you close your
What happens is that the page appears to be loaded on the user’s machine, so their eyes can begin scanning the offerings, all the while the JavaScript is catching up in the rears and loading in the background.Tip: If you don’t want to physically move the JavaScript tags, as you feel it will mess up the way your site works, I recommend using the defer property. Usage is asfollows:
<script defer='defer'>
4. Using Subdomains for parallel downloadsParallel downloads are when you increase the simultaneous file downloads. If you have your status bar open in your footer, you will notice when traveling other websites making requests to static.domain.com and c1.domain.com.This is a great way to optimize load performance. Although you will simply be using subdomains, and the content is on the same server, the browser see’s it as a seperate server.To set this up:
- Create 3 Subdomains on your server
- Place your images in a folder in each of the subdomains
- Replace the image locations in your site to the paths of the newly create subdomains.
Now with JavaScript files, this doesn’t exceed beyond two parallel at a time.
5. Adding an Expires HeaderSome sites are just very rich, even after using the techniques described above, performance seems as if it can be increased even more.A user can go to your website and make all the necessary HTTP requests to render the page, images, scripts, etc. When you use an Expires Header, you can cache those elements on the user’s local machine, not only increasing their speed, but also saving you bandwidth. An Expires header can be used on all your scripts, CSS, and images as well.This can be done simply by adding a line of code to your .htaccess file in the root directory of your site (if you don’t have one, you can create one - use a text editor and save it as .htaccess, then upload it to your root directory).The following .htaccess entry sets a far future expires header sometime in 2010 for file types such as .ico, .pfd, .flv (Flash source files), .jpg, .png, etc.
<FilesMatch "\.(ico|pdf|flv|jpg|jpeg|png|gif|js|CSS|swf)$">
Header set Expires "Thu, 15 Apr 2010 20:00:00 GMT"
</FilesMatch>
Beware: if you make updates to a file that has a far future expires header, you’ll have to rename it (version it) or else users with primed caches won’t see the updates. For example, if you have a JavaScript file that you made updates to, use version numbers and then update all the files that refer to the old version (i.e. javascriptfile-1.0.js, javascriptfile-1.1.js)
Reference1) Five Ways to Speed Up Page Response Times

 Figure 3: Performance tab shows you a letter grade (A, B, C, D, F) and a percent grade (1-100).
 Figure 4: The Components tab.
 Figure 5: Stats tab.
No comments:
Post a Comment