Showing posts with label Jquery. Show all posts

Monday, May 16, 2011

jQuery Visual Cheat Sheet 1.6

The new edition of jQuery Visual Cheat Sheet (1.6), the most popular cheat sheet about jQuery over the internet, is here! The new edition includes all the reference you will ever need for jQuery 1.6 API. You can download the latest version from here.


All and any comments / bugs / suggestions are welcomed !

Wednesday, September 23, 2009

Inserting Inside Using Jquery

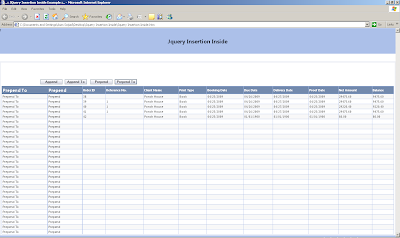
In this Post I will show you how you can insert the new elements at run time in web application, using jquery library. Below is the image of the example source, which consist of table and four button control. Append, Append To, Prepend and Prepend To are used as button.Let us start our example.


1- Append
The first way to add the new element to the exist element is the use of the append function. Below is the code which is execute when user click the append button on the main form. In the click event of the append button I have used the append in the first statement which is used to add the column in the first line and then in the each selector (which is used to add the columns in the remain rows of the table. It will used to insert new column at the end.

$("#btnAppend").click(function()
{
$('#tblMainTable tr:first').append("<td class='TableHeading'>Append</td>");
$('#tblMainTable tr:not(:first)').each(function(){
$(this).append("<td class='tdMiddleCells'>Append</td>");
});
});
Here is the syntax of the append function.
.append(content)
Parameter for the append function is the content, A selector, element, HTML string, or jQuery object to insert at the end of each element in the set of matched elements. It will return jQuery object, for chaining purposes.

2- Append To
The second way to insert the new element is by use of the appendTo function which do the same task as the append function do. The only difference is in the syntax—specifically, in the placement of the content and target. With .append(), the selector expression preceding the method is the container into which the content is inserted. With .appendTo(), on the other hand, the content precedes the method, either as a selector expression or as markup created on the fly, and it is inserted into the target container.
$("#btnAppendTo").click(function()
{
$("<td class='TableHeading'>Append To</td>").appendTo('#tblMainTable tr:first');
$('#tblMainTable tr:not(:first)').each(function(){
$("<td class='TableHeading'>Append To</td>").appendTo(this);
});
});
Here is the syntax of the appendTo function.
.appendTo(target)
Parameter for the appendTo function is the target, A selector, element, HTML string, or jQuery object; the matched set of elements will be inserted at the end of the element(s) specified by this parameter. It will return jQuery object, for chaining purposes. Here is the output of the both append and appendTo calls.


3- Prepend
The third way to insert new element is the use of the prepend function. This operation is the best way to insert elements inside, at the beginning, of all matched elements.
$("#btnPrepend").click(function()
{
$('#tblMainTable tr:first').prepend("<td class='TableHeading'>Prepend</td>");
$('#tblMainTable tr:not(:first)').each(function(){
$(this).appendTo("<td class='TableHeading'>Prepend</td>");
});
});

Here is the syntax of the appendTo function.
.prepend(content)
Inserts content, specified by the parameter, at the beginning of each element in the set of matched elements.Parameter for the prepend function is content, An element, HTML string, or jQuery object to insert at the beginning of each element in the set of matched elements. It will return jQuery object, for chaining purposes.

4- Prepend To
The fouth way to insert the new element is by using of the prependTo function which do the same task as the prepend function do. The only difference is in the syntax—specifically, in the placement of the content and target. With .prepend(), the selector expression preceding the method is the container into which the content is inserted. With .prependTo(), on the other hand, the content precedes the method, either as a selector expression or as markup created on the fly, and it is inserted into the target container.
$("#btnPrependTo").click(function()
{
$("<td class='TableHeading'>Prepend To</td>").prependTo('#tblMainTable tr:first');
$('#tblMainTable tr:not(:first)').each(function(){
$("<td class='TableHeading'>Prepend To To</td>").prependTo(this);
});
});
Here is the syntax of the prependTo function.
.prependTo(target)
Parameter for the prependTo function is the target, A selector, element, HTML string, or jQuery object; the matched set of elements will be inserted at the beginning of the element(s) specified by this parameter. It will return jQuery object, for chaining purposes.
Here is the output of the both the prepend and prependTo calls.


You can download the source code from here
All and any comments / bugs / suggestions are welcomed!

Saturday, September 12, 2009

Required Field Validation Using Jquery

In this post I will show you how you can validate the required fields of the form. For this post I have simple asp.net form which has first name, last name, email address , user name and the password field, and also two button controls one for save which is used to check for the required fields and the cancel button. Here is the main form of the source example.

And here is the output of the main form when user click on the save button, as you can see that First name , Email address , login name and password fields are required so the border and the back ground color of these field change to red, to indicate that these fields are required.

Here is my Code which is written on the form and which is used to attached the click event with the button control.In the click event I have called the validation() function which is written on the plug-in.
$(document).ready(function()
{
$("#cmdSave").click(function ()
{
return $('#'+'<%=frmMainForm.ClientID %>').validation();
});
});
And here is my plug-in code which is used to check for the required field in the form. Here in the code I have first search the control which has .reg css class in the form by using the each of the jquery.
var blnIsError = true;
$('.req', this).each(function() {
if ($(this).val()== "")
{
$(this).addClass("ErrorMessage");
$(this)[0].title='Enter required field.';
blnIsError =false;
}
});

$('.req').bind("keyup", function()
{
if($(this).val() !='')
{
$(this).removeClass('ErrorMessage');
$(this)[0].title='';
}
});

return blnIsError;
Then in the function I have check the val() of the current control and if the value of the current control is empty string then add new class of css which has property of the background color and the border of the control to be set to red. After checking for the required field by using the reg css class, then I have bind keyup event to each of the reg control so if user enter the value in the control then the Error message class will be removed from that control.

You can download the source code from here

Note: In order to work with this plug-in you have to add reg. class with the control which are required field.
All and any comments / bugs / suggestions are welcomed!

Saturday, August 15, 2009

Populate dropdown based on selection of other dropdown in ASP.NET Using Jquery Json

I have used the Json technique to retrieve the server side records on the client side in my post Using Json in Asp.net Application, where I have explain how you can retrieve json data. Now here in this post i will use same example which is used in that post and show you how you can use the json of the jquery.For detail of the example you can visit my Using Json in Asp.net Application,post , here I will explain the JavaScript I have used to retrieve the values of the second dropdown list control. Here is my JavaScript code. In the code below I just bind the change event to the ddlRegion dropdown list control which also act as parent control. In the change event of the region dropdown list control, I have save the value of the region which is the id of the region and then build the url which consist of the page name plus the regionID and the sid as query string parameters.
$(document).ready(function()
{
$("#ddlRegion").change(function(){
var regionID = this.value;

var url="ResponsePage.aspx";
url=url+"?regionID="+ regionID;
url=url+"&sid="+Math.random();

$.getJSON(url, function(returnDataCollection)
{
$("#ddlTerritory")[0].innerHTML ='';
for(var intCounter=0; intCounter < returnDataCollection.length-1; intCounter++)
{
$("#ddlTerritory").append($("<option></option>").val(returnDataCollection[intCounter].TerritoryID ).html(returnDataCollection[intCounter].TerritoryDescription));
}
});
});
});

Next is the call to the $.getJSON function and here is the syntax of the $.getJSON function.
 $.getJSON(url[, data][, success]) 
Here are the detail of the parameter list which are passed to the function.
  • url: A string containing the URL to which the request is sent
  • data: (optional): A map of data that is sent with the request
  • success: (optional): A function that is executed if the request succeeds
And $.getJSON function return the XMLHttpRequest object that was created.The callback is passed the returned data, which will be a JavaScript object or array as defined by the JSON structure and parsed using the eval() function. Then in the success function I have loop through the array collection and add the values in the next dropdownlist control.You can download the source code from here.

All and any comments / bugs / suggestions are welcomed!

Friday, May 15, 2009

Jquery Selectors

In my one of the projects One of the client required some sort of report about his system, for that reports I have generated the html table in code behind file , from server side.Here is the format of the report.


You can see from the above report that each alternative color is give to each of the row in the table. While designing the above table I have to give the different css class to the each cell depending upon the location of the cell in the row, I have different css class for the first cell of each of the row as the style properties such as the top, bottom, left and right of the first cell of each row is different from the cell next to it. So I have 3 css class for the cell one for the very first cell of the table and one for the first cell of the every row and the one for the remaining cells in the table. Let us start with the example of how to achieve this functionality with the use of jquery selectors.
:even and :odd Selectors:
The even and the odd selectors are very handy selectors of the jquery. As there name is self describing even selector is used to select the even elements and the odd selector select the odd elements when used. The :odd and :even selectors use JavaScript's native zero-based numbering. Therefore, the first row counts as 0 (even) and the second row counts as 1 (odd), and so on.

$('#tblMainTable tr:odd').addClass('alternativeRowColor');

In the above statement I have provided the name of the table which is tblMainTable so that the alternative row color is applied only to the table of the given name, this is handy when you have multiple table in you aspx form and you want to apply the alternative row color to a given table. If you omit the name of the table then it will apply the alternative row color to the all the table in the web form or aspx page. If we omit the table name and the web form has multiple table then the alternative row color is applied in the following order. If the last row of the first table has a white background, then first row in the next table would have the "alternate" background. Same is the use of the even select which will select the even rows or elements, starting from the 0(zero) index and then 2 and so on.

:first and :last Selectors:
By using the odd and the even select I have assign the alternative color to the table rows now I have to assign the css classes to the table cell based on the location of the cell in the table and row. Here is the statement or jquery code which is used to assign the css classes to the first row of the table , you can say that header row of the table, I have not used thead part of the html table. For the very first cell of the table I have set the top, bottom, left and right border and set the style and the color of the border as it is the fist cell so it include all four side border. By using the statement below I have give the name of the table and then select the first row of the table and then the first cell of that row.The first selector will matches the first selected element and the last selector will matchs the last selected element.

$('#tblMainTable tr:first td:first').addClass('tdBorderTopLeftMostCell')
$('#tblMainTable tr:first td:first').nextAll().addClass('tdBorderTopMostCell');

As the first cell of the table is set the border on all side so the next cell will have no border on lef side but that will contain the border on remaining three sides. So I have to set different css class for the remaining header cell of the table. For this purpose I have apply same css class for the remaining cells and need to select the remaining cells of the table. For this purpose I have repeat the previous statement and after that function call I have call the nextAll function which will return all sibling cells after the first cell. The nextAll find all sibling elements after the current element. Like the nextAll jquery has the prevAll which will select the previous elements.The last selector will select the last element.
For the rest of the rows as they are same in nature, like the first cell of each row has the left, bottom and the right side border and the remaining cell in same row has only the bottom and right side borders, so you can say that they have same in nature. Here is the small piece of the jquery code which will set the border to the first and the remaining cell of the rows.

$('#tblMainTable tr').each(function(){
$('td:first', this).addClass('tdBorderLeftMostCell');
$('td:first', this).nextAll().addClass('tdMiddleCells');
});

In the above code I have used the each function of the jquery to iterate through the every row of the table and then using that row by using this key word apply the css class to the first and the remaining cell of the current row. As in this post I am discussing the some of the selector of the jquery so I will not discuss the each function of the jquery, will discuss it in other post.

You can download the source code from here.

All and any comments / bugs / suggestions are welcomed!

Sunday, May 10, 2009

Detecting Useragent Using Jquery

Browser detection might seem, at first, like a logical way to deal with browser differences. After all, it’s easy to say: “I know what the set of capabilities of browser X are, so testing for the browser makes perfect sense, right?” But browser detection is full of pitfalls and problems.Browsers identify themselves by setting a request header known as the user agent string. Parsing this string isn’t for the faint-hearted. In addition, many browsers now allow their users to spoof this string, so we can’t even believe what it tells us after we do parse it! A JavaScript object named navigator gives us a partial glimpse into the user agent information, but even it has browser differences. We almost need to do browser detection in order to do browser detection!
jQuery provides a set of flags that we can use for branching that are set up when the library is loaded, making them available even before any ready handlers have executed. They are defined as properties of an object instance with a reference of $.browser. The formal syntax for this flag set is as follows:

$.browser
Defines a set of flags that can be used to discover to which broad set of browser families the
current user agent belongs. These flags are as follows:
  • msie—Set to true if the user agent header identifies the browser as Microsoft Internet Explorer.
  • mozilla—Set to true if the user agent header identifies the browser as any Mozillabased browser. This includes browsers such as Firefox, Camino, and Netscape.
  • safari—Set to true if the user agent header identifies the browser as Safari or any Safari-based browser.
  • opera—Set to true if the user agent header identifies the browser as Opera.
  • version—Set to the version number of the rendering engine for the browser.
Note that these flags don’t attempt to identify the specific browser that’s being used; jQuery classifies a user agent based upon which family of browsers it belongs to. Browsers within each family will sport the same sets of characteristics; specific browser identification should not be necessary. The vast majority of commonly used, modern browsers will fall into one of these four browser families.
The version property deserves special notice because it’s not as handy as we might think. The value set into this property isn’t the version of the browser (as we might initially believe) but the version of the browser’s rendering engine. For example, when executed within Firefox 2.0.0.2, the reported version is 1.8.1.6— the version of the Gecko rendering engine. This value is handy for distinguishing between IE6 and IE7, containing 6.0 and 7.0 respectively.
We mentioned earlier that there are times when we can’t fall back on object detection and must resort to browser detection. One example of such a situation is when the difference between browsers isn’t that they present different object classes or different methods but that the parameters passed to a method are interpreted differently across the browser implementations. In such a case, there’s no object to perform detection on.

All and any comments / bugs / suggestions are welcomed!


Friday, April 24, 2009

jQuery Alert Dialogs

This jQuery plugin aims to replace the basic functionality provided by the standard JavaScript alert(), confirm(), and prompt() functions. What's the benefit of using custom methods? Well, a few good reasons, really: - These are completely customizable via CSS (which can make your apps look much more professional) - You can set a custom title for each dialog - IE7 users get an ugly warning and usually have to reload the page if you use a regular prompt() These methods simulate a true modal dialog box. They will automatically re-position themselves if you resize the browser window (unlike many existing dialog/lightbox-style plugins). If you include the jQuery UI Draggable plugin, the dialogs can be moved by dragging their title bars. Everything you need to produce the dialogs in the demonstration is included in the download.
Here is the syntax of the dialogs which are the alert, confirm and the prompt function. All these three functions take same number of arguments, except the Prompt function which take an extra parameter which is the value.

jAlert( message, [title, callback] )
jConfirm( message, [title, callback] )
jPrompt( message, [value, title, callback] )

You can find detail of the alert plug-in by clicking here . And download the examples from there.

All and any comments / bugs / suggestions are welcomed!


Monday, March 30, 2009

Fading Effects in Jquery

Fading effects in jquery is very easy as jquery provide the required functions which are necessary for the user requirements for fading effects. Here is the list of the function which are given in the documentation of the jquery.
Function Name
Function Name
fadeIn(speed, callback)
fadeOut(speed, callback)
fadeTo(speed, opacity[, callback])
All the function in the above list return same object on which the function apply the fading which can be used for chaining purpose. The fading function work on the opacity property of the element mean these functions will increase or decrease the opacity property to achieve the goal of fading effect. The example used for this post is similar to the example in my previous post Sliding animation in jquery. Now let us start with our example code. To recall your memories the controls used in this example are three buttons named cmdFadeIn, cmdFadeOut and cmdFadeTo so that you understand the purpose of the buttons by theirs names, and one div element named myDiv which is used for the fading purpose and i have fill the div element with the black color so that the area of the div is visible to you and you will see the fading effect on the div element.
First of all i will write the code for the fadeIn function and then will explain the code, how the code work what are the required parameters and what are the optional.
$("#cmdFadeIn").click(function()
{
$("#myDiv").fadeIn('slow',CallBackFunction);
});

function CallBackFunction()
{
alert("Call back Function Called.");
}
The above code is complete code you can use to pass the maximum number of parameters to the fadeIn function. Which are the speed and the callback function to the fadeIn Function. First i have bind the click event to the my button control by using the id of the button control which is "cmdFadeIn" and then in the definition of the click event function for the button. I have used the div control id to bind the fadeIn function by passing the parameter slow and attaching the call back function to the fadeIn function call. Which in this case is the CallBackFunction function .if you want to omit the speed parameter then you can omit the speed parameter and the default value of the speed is used which is the normal speed. As in my previous post i have said that the fading function only change one property which is the opacity of the element. In case of fadeIn the opacity of the element is increase and the element is shown. if the element is shown, mean its opacity is to the maximum then it will not animate the element as it is visible. But if you attach the callback function to the fadeIn function then that function is called every time the fadeIn function is called whether fading effect are applied or not.
Here is the code you can use to call the fadeOut function of the fading animation effects. The code is similar to the code for the fadeIn only change is the function call which is replace by fadeOut.
$("#cmdFadeOut").click(function()
{
$("#myDiv").fadeOut('slow',CallBackFunction);
});

function CallBackFunction()
{
alert("Call back Function Called.");
}
The fadeOut function is opposite to the fadeIn function. What fadeOut function do is that it will decrease the opacity property of the element to hide them. If you provide the speed value or animation time to complete the showing of the element then it will show the element in that interval of time. if no speed value is given then the normal parameter is taken as default parameter which has the value of .4 milliseconds to complete the animations.
$("#cmdFadeTo").click(function()
{
$("#myDiv").fadeTo('slow',0.5,CallBackFunction);
});

function CallBackFunction()
{
alert("Call back Function Called.");
}
In above code the fadeTo function is called with maximum number of parameters. For calling the fadeTo function you must provide the speed and opacity parameter, the opacity parameter denote the resultant opacity of the control, which can be from 0(zero) to 1. Once the animation of the fading is completed the callback function is called, if provided in the parameter list. The fadeTo function is will decrease the opacity of the element, if the element is fadeOut mean hide then it will change the opacity value of the element to the value which is passed as parameter to the function, but you can't see fading effects as the element is fadeOut before. Now if you apply the fadeIn effect then you can see opacity of the element is as set by the fadeTo function.
Unlike the other effects that adjust opacity while hiding or revealing elements, fadeTo() doesn’t remember the original opacity of an element. This makes sense because the whole purpose of this effect is to explicitly change the opacity to a specific value.
Hope you will get some idea about the fading effect in jquery. You can download the source code from here


All and any comments / bugs / suggestions are welcomed!

Tuesday, March 10, 2009

Sliding Animation in Jquery

In my previous post i give some overview of the animation in jquery and give detail explanation of the parameters and function which are used for the animation. Now in this post i will try to explain in detail of Sliding effect in jquery and how can you used it. Here is list of function for sliding an element. One thing i will mention here is that all these functions return same object , which you can use for chaining purpose. You can use that return object to call other function as well.
Function Name
Function Name
slideDown(speed, callback)
slideUp(speed, callback)
slideToggle(speed, callback)
Let us start with our example, For this example i had added three buttons named cmdSlideDown, cmdSlideUp and cmdSlideToggle so that you understand the purpose of the buttons by theirs names, and one div element named myDiv which is used for the sliding purpose and i have fill the div element with the black color so that the area of the div is visible to you and you will see the animation of the div element.
First of all i will write the code for the slideDown function and then will explain the code, how the code work what are the required parameters and what are the optional.
$("#cmdSlideDown").click(function()
{
$("#myDiv").slideDown('slow',AnimationFinished);
});

function AnimationFinished()
{
alert("Animation finished");
}
The above code is complete code you can use to pass the maximum number of parameters to the slideDown function. Which are the speed and the callback function to the slideDown Function. First i have bind the click event to the my button control by using the id of the button control which is "cmdSlideDown" and then in the definition of the click event function for the button. I have used the div control id to bind the slideDown function by passing the parameter slow and attaching the call back function to the slideDown function call. Which in this case is the AnimationFinished function , you can replace it with your callback function.if you want to omit the speed parameter then you can and the default value of the speed is used which is the normal speed. As in my previous post i have said that the sliding function only change one property which is the height of the element. In case of slideDown the height of the element is increase and the element is shown. if the element is shown, mean its height is to the maximum then it will not animate the element as it is visible. But if you attach the callback function to the slideDown function then that function is called every time the slideDown function is called whether it animate the element or not.
Here is the code you can use to call the slideUp function of the sliding animation effects. The code is similar to the code for the slideDown only change is the function call which is replace by slideUp.
$("#cmdSlideDown").click(function()
{
$("#myDiv").slideUp('slow',AnimationFinished);
});

function AnimationFinished()
{
alert("Animation finished");
}
The slideUp function is opposite to the slideDown function. What slideUp function do is that it will decrease the height property of the element to hide them. If you provide the speed value or animation time to complete the hiding of the element then it will hide the element in that interval of time. if no speed value is given then the normal parameter is taken as default parameter which has the value of .4 milliseconds to complete the animations.
Here is the last function for the sliding animation category in jquery, which is slideToggle, which perform both the above functionality for you at same time. which are slideDown and slideUp
$("#cmdSlideDown").click(function()
{
$("#myDiv").slideToggle('slow',AnimationFinished);
});

function AnimationFinished()
{
alert("Animation finished");
}
The detail of the slideToggle function is that it will take same number of parameter like the slideDown and slideUp but it perform both the slideDown and slideUp functionality at same time. Mean if you call slideToggle for first time, if the element is hide, then it will increase the height property of the element to show it. or if the element is shown then it will decrease the height of the element to hide it. It will perform slideDown and slideUp functionality in sequence , if element is hide then it will show that element and if the element is shown then it will hide that element. On each slideToggle call it will show or hide the element by sliding motion depending of the state of the element.
Hope you will get some idea about the sliding effect in jquery. You can download the source code from here

All and any comments / bugs / suggestions are welcomed!

Effects In Jquery

After long time wait and away to the web development, i came back to the web development, In this post i will try to give you an over view of the effects provided by the jquery and how you can use them in your web project give animated look.
Jquery provide the following categories of the effect you can you use.
  1. Basic
  2. Sliding
  3. Fading
  4. Custom
1- Basic:
The basic animation include
Function Name
Function Name
show()
show(speed, callback)
hide()
hide(speed, callback)
toggle()
toggle(speed, callback)
The show, hide and toggle function are simple used to show/hide a control. The function on left side takes no parameter and will show or hide the control immediately with not animation or effect. And the toggle function will do both show and hide functionality for you, if the control is hidden then it will display and if the control is shown then it will hidden. The function on the right side will take parameter, one is speed and one is the callback function which is executed when the animation/effect is finished. The show/hide and toggle function will change the width , height and the opacity of the control to hide/show the control at same time. Here is the detail of the speed parameter which is passed to the show, hide or toggle function.

Speed Parameter:
The speed parameter specify how long it will take to finished the show/hide of the control, in other worlds you can say how long it will tak to show/hide the control.You can pass speed parameter in string or number format, In case of string you can pass normal, slow and fast and in case of number format you can pass number to the function. If you provide the number as speed to the function then the number is treated as millisecond duration to animated the control. Higher the value of the speed slower the animation is and lower the value of the speed as number faster the animation is. The normal string parameter will take .4 seconds to complete the animation and the slow string parameter takes .6 seconds and the fast will take .2 seconds to complete the animation. So it is up to you whether you use the string or number as speed parameter to pass the show/hide/toggle function for animations.

2- Sliding
The sliding category of the effect contain only three functions
Function Name
Function Name
slideDown(speed, callback)
slideUp(speed, callback)
slideToggle(speed, callback)
The above three sliding function will take same number of parameters which are the speed and the callback.The sliding function only animate the height of the matching elements, only one property of the control which is different from the show/hide function which animate the width, height and the opacity of the element at same time. You can pass speed parameter to the sliding function if you which may be either string value normal, slow or fast or any number in milliseconds, if you don't pass any speed parameter then normal is consider. And the second parameter which is the callback function you can use the callback function to execute the animation in a sequence. Mean if one animation finished then second one started and then so on and on. The SlideDown function will increase the height of the element to animate it, and the slideUp will decrease the height of the function to animate it until the element is hide.

3- Fading
The fading category consist of the following three functions
Function Name
Function Name
fadeIn(speed, callback)
fadeOut(speed, callback)
fadeTo(speed, opacity, callback)
The fading function will work on the opacity property of the element. As previous effect function like show, hide, slideUp , slideDown etc , it will take the speed parameter and describe above and the callback function if you want to do some functionality on completion of the animation. The fadeIn function will display the element by fading them to opaque and the fadeOut function will disappear the element by fadding them to transparent. And the last fadeTo function will take one extra parameter which is the opacity, you can pass the opacity in the rang of 0 to 1.

Hope you will get some idea about the Effect/animation in jquery, in the next or coming post i will try to explain you the effect/animation by giving examples

All and any comments / bugs / suggestions are welcomed!


Saturday, January 24, 2009

Live Event in Jquery

In latest version of jquery 1.3 i have seen interesting is the events which i would like to share with you. These events are the live and the die event which are new in the latest version of jquery 1.3. So in this post i will explain these two event handlers.

Live Event

Binds a handler to an event (like click) for all current - and future - matched element. Can also bind custom events. The Live event looks like this.

live( type, fn )

Where type is one of the events like click, dbclick etc. According to jquery website currently the event type which are supported by the live event are table 1
Event Type
Event Type
click
dbclick
mousedownmouseup
mousemovemouseover
mouseoutkeyup
keydownkeypress

Table 1 contain the list of event type which are currently supported by the live event handler. You can use one of the above mentioned event type in your live event handler to bind the event to the current element(s) or the element(s) which are added in future in the form. And the events type which are not currently supported is listed in the table 2
Event Type
Event Type
blur
focus
mouseenter
mouseleave
change
submit
And the second parameter to the live function is the function to be executed when the event type event is occured.
Now let us start our example of how to use the live event. In the example code i have added a paragraph tag and also two button which are used to bind and unbind the event, in this case i am using the click event type for the example.
$().ready(function()
{
var intCounter=1;
$("p").live("click", ParagraphClick);
$("#cmdBind").click(function ()
{
$("p").live("click", ParagraphClick);
});

$("#cmdUnbind").click(function ()
{
$("p").die("click", ParagraphClick);
});

function ParagraphClick()
{
$(this).after("Paragraph Number:"+intCounter+"");
intCounter++;
}
});
First what i did is to attach click event to the paragraph tag by using the live event handler , by passing the event type of "click" and the function name ParagraphClick funtion name, the paragraphClick function just add new paragraph after the clicking element by calling after function. Now if you click the first paragraph element which contain the text "Click me" which also have different background color, new element is added after the clicking element. Now if you click the new element it(click event of the paragraph) will add new element after the clicking element. Mean the click event which is attached with the first paragraph (which is the current element added at design time) is now also attached with the new element which is created by clicking on the paragraph element. Which is the definition of the live event handler (jquery)
"Binds a handler to an event (like click) for all current - and future - matched element."

Die Event

The die event handler will do opposite to the live event , it will unbind the event type.It has following form.

die([type], [fn] )

As from the above definition of teh die event, both parameters are optional, mean if you call the the die without any parameter it will unbind all the event which are bind using the live, and if you want to remove specific event for example click, dbclick etc then you can pass the type and it will unbind on that type of event handler, but if you provide the second parameter then it will unbind that specific event handler, not the other event handler which are attched using the live event.You can download the source code from here

All and any comments / bugs / suggestions are welcomed!

Sunday, January 18, 2009

Latest Version of Jquery

Today i am pleased to tell you that new version of jquery is released. The jquery latest version can be downloaded from the the jquery Web site. Amongst the other update in that release now they(jquery team ) has release the API Browser which looks like

The new API browser includes the following features:
  • All the latest jQuery and jQuery UI documentation.
  • The ability to mark pages as favorites for those pages you keep wanting to return to.
  • Syntax highlighting in the code examples
  • Live running of examples within the browser
  • Links to edit and experiment with the code examples

Most importantly though, the API browser is also available offline as an Adobe AIR application (thanks to Tane Piper’s AIR framework). The interface looks and works the same, and includes an auto-update mechanism, so you’ll always be up to date.

And at the end Happy 3rd birthday to the jquery :)

Sunday, January 4, 2009

Jquery for Beginners: Events Handling Part 2 (Continue)

In previous post Jquery for Beginner: Event Handling Part 2 i have give complete list of events which are available in jquery. In previous post i have discuss the event which are related with the mouse, but in this article i will discuss events which are related to the keyboard. The keyboard events are
Event NameEvent Name
keydown()keydown(fn)
keypress()keypress(fn)
keyup()keyup(fn)
Above are the list of events which are related to the keyboard. Let us start with keydown event which is fired when any of the keyboard key is down. The syntax for calling the event is as below.
$(document).ready(function()
{
$('#txtValue').keydown(function(passedEvent)
{
alert(passedEvent.keyCode);
});
});
Above code is simple example of how you can bind the keydown event handler with any of the input control you have on your web page. In the above code i just output the keyCode which is the property of the event, which is passed as argument to the keydown function. The event name is optional, if you don't want to pass the parameter you can remove the parameter. But if you need to know which key is press or some additional information when the key is down then it is helpful to pass the event.
Property
Description
altKeyValue will be true if alt key is press else false.
ctrlKeyValue will be true if ctrl key is press else false.
shiftKeyValue will be true if ctrl key is press else false.
keyCodeThis Property hold the value of the key in numeric format.
whichThis property hold the value of the key in numeric format, in case of key board event.
metaKeySet to true if the Meta key was pressed when the event was triggered, false if not.The Meta key is the Ctrl key
on PCs and the Command key on Macs
In the above table , these are the some of the properties which are available when event is passed to the function which is bind with the event. Importantly, the keypress property isn’t reliable cross-browser for non-alphabetic characters. For instance, the left arrow key has a code of 37, which works reliably on keyup and keydown events. Safari returns nonstandard results for these keys on a keypress event. We can get a reliable, case-sensitive character code in the which property of keypress events. During keyup and keydown events, we can only get a case insensitive key code (so a and A both return 65), but we can determine case by checking shiftKey. The Event instance contains not only properties that give us information regarding the event that’s handled, but also possesses a handful of methods that lets us control the propagation of the event.
The which property which is used to hold the value of the key in numeric format. And if the event is cause by the mouse then it will hold the value of the mouse key which is
  1. 1 for left mouse key
  2. 2 for middle mouse key
  3. 3 for right mouse key.

Key press:

The keypress event is fired after the keydown event. This is similar to the keydown event, except in the case of key repeats. The keypress and keydown event are similar but there is difference in between these two, the keydown event is fired if you press modifier keys such as shift key.But the keypress event is not fired if you press the shift key or ctrl key(control key).
One important thing to remember is that keydown and keyup event handler will give you the code which key is press which include the shift, ctrl key as well, But the keypress event key code indicate which character was entered. For example, a lowercase "a" will be reported as 65 by keydown and keyup, but as 97 by keypress. An uppercase "A" is reported as 97 by all events. This can be the primary motivator for deciding which event type to use.

key up:

The keyup event is fired after the keypress event.The keyup event is sent to an element when the user releases a key on the keyboard. It can be attached to any element, but the event is only sent to the element that has the focus. Focusable elements can vary between browsers, but form elements can always get focus so are reasonable candidates for this event type.


You can download source code from by Clicking here
back to content

Thursday, January 1, 2009

Jquery , Ajax Update Panel Problem and Solution

In this article i will share my experience of using the Jquery with the Ajax UpdatePanel and the problem i have faced when using the both at the same time. I will try to explain the problem and then i will give you the solution of the problem in simple manner so that you understand it clearly.

The Problem

In the example which i will use contain one dropDownList , a label to show the selected value of the dropDownList and a button which bind the jquery click event. All the three controls are inside the Ajax UpdatePanel. This is the simple example to show you what is the problem when using Jquery and Ajax UpdatePanel at the same time. So when i run the web application and page is loaded in my browser first thing i do is to click on the button, and it display the message 'From ready Function' is displayed, but when the selectedIndex changed event of the dropDownList is fired and the page is partial postback, and now if i click the button again no message is displayed. Due to the partial postback, UpdatePanel completely replaces the contents of the UpdatePanel on an update. This means that those events you subscribed to are no longer subscribed because there are new elements in that update panel.

$().ready(function()
{
BindEvents('From ready Function');
});


function BindEvents(strPassedValue)
{
$('#cmdClickMe').click(function()
{
alert(strPassedValue);
});
}

So the jquery click event which was bind when page was first requested is not any more attached with the button. So we need to bind the click event again with the button.

Solution

The solution to the above problem is very simple one what you have to do is to place the below function just after the ContentTemplate tag inside the UpdatePanel. Here what i did is the call the BindEvents function which is also called when the ready() function of the jquery is executed. So when the partial postback end we capture the endRequest event and then call the function which will bind the event again. now if you repeat the cycle which i have mention in the problem section then you can see
  1. when page is loaded first time if we click the button then it will display message 'From ready Function'.
  2. Now if you click the dropDownList then it will display the selected value from the dropDownList in the label and the partial postback occurred.
  3. Now if you click the button again then you can see the message 'From add_endRequest called!' which mean the event is bind from the add_endRequstion function.
var prm = Sys.WebForms.PageRequestManager.getInstance();
prm.add_endRequest(function()
{
BindEvents('From add_endRequest called!');
});

This is the simple application to let you know what is the problem and how can you solve that problem. Hope this will solve your problem.

You can download source code from by Clicking here

Thursday, December 25, 2008

Jquery for Beginners: Events Handling Part 2

This is the second article of the Jquey for Beginners: Event Handling. In the first Article i give some information how you attach the event with the controls. Here is the list of the some of the event helper Table 1.

Event NameEvent Name
blur()blur(fn)
change()change(fn)
click()click(fn)
dbclick()dbclick(fn)
error() error(fn)
focus()focus(fn)
keydown()keydown(fn)
keypress()keypress(fn)
keyup()keyup(fn)
load(fn)unload(fn)
mousedown(fn) mousemove(fn)
mouseout(fn)mouseover(fn)
resize(fn)scroll(fn)
select()select(fn)
submit()submit(fn)
hover(handlerIn, handlerOut)toggle(handlerEven, handlerOdd)
These are the event handler used in the jquery and also called Event helper. The events i have mentioned above in the table return jquery object by which the event is bind, as jquery support chainability so the return object is used to apply another function on that object. We can divide events in the Table 2 into three categories.
  1. Events which are related to the mouse, also called mouse events which include click, mouseover , mouseout etc.
  2. Events which are related to the key board, also called Keyboard event which include the keypress, keyup etc.
  3. Events which are related to the form. which include the load and unload of the form.
Let us start with the events related to the mouse, then event related with the keyboard and the at the end the events which are related with the form.
The event listed in Table 1 are also the shorthand of the bind() event handler where you have to specify the event name and the function to be executed when the event is fired. Let us start with the most used mouse event which is click. Here is the code you can use to bind the click event with the control.
$(document).ready(function()
{
// use this to reset a single form
$("#reset").click(function()
{
alert("Button is Click")
});
});
The code above is simple one i have used the id of the button "reset" to bind the click event with it, so when the button is click alert message "Button is Click" is shown. Below is the code for both the click(fn) and click event handler. The code above is also shortcut for the .bind('click', handler)

$(document).ready(function()
{
$("#myDiv").click(ClickCalled);
$("#myDiv").click();
});

function ClickCalled()
{
alert('called');
}

you can see the from above code snip that when the page is loaded the function is called as i have call the $("#myDiv").click(); which will call the function associated with the click event or you can say in the previouse statement i have attach the ClickCalled function. This remind me the buttonName.PerformClick(); function. Which i love to use in the desktop application when i develope the desktop application, now i am happy to use it in the jquery as well and i am very happy that jquery has given this functinality.Although we can call the function but calling the click() function is really cool. Remember that you have to attach the click event handler before
calling the . click() event. The dbclick event is similar to the .click except the event is fired when mouse is double click and hope you can do yourself i will not explain it here, if you need help regarding dbclick then please tell me i will help you.
Next event which i will explain you related to the mouse is the hover() event handler , you can see in Table 1 that the .hover(handlerIn, handlerOut) takes two functions as parameter one is used when mouse enter into the control to which the hover is bind and the handlerOut is used when the mouse is leave that control. For the javascript programmer who use the mouseout and mouseover for the simple effect for example when mouse is over to over a button then the background color is change from the default to new color and when mouse is out of that control then the default color is set.
$(document).ready(function()
{
$('#myDiv').hover(function()
{
$(this).css('background','pink');;
},
function()
{
$(this).css('background','#000');;
});
});


Above is the simple code which illustrate how you can use the hover event handler to bind the two functions, the above code will change the background color of the div which to pink when the mouse is over the div and set the default color of black when mouse leave the div control.

The remain events which are related to the mouse , i will leave the reader to discover them and use them, if you need any help regarding the the mouse events please do tell l me. Events for the keyboard and the form i will discuss in next post , hope this will help you and you get some help from this post as well. If you have any question please do tell me , i will try my level best to give you answer.

back to content