First of all you have to download the latest verion of the curvy corner file from here. In the folder you have extracted from the downloaded zip file you will contain two javascript files
1- curvycorners.js which is compressed file and its size is 16 k
2- curvycorners.src.js which uncompressed file and its size is 47k and is is readable
and also the demo html file as well and some other stuff related to th demo html pages.
First you have to place the curvyCorner.js which is of 16 k in javascript folder of your project or any where you like i have placed it in js folder of my project.
in my .aspx page in the header firt i have include the javascript file by setting the src property of the script tag
src="Js/curvycorners.js"
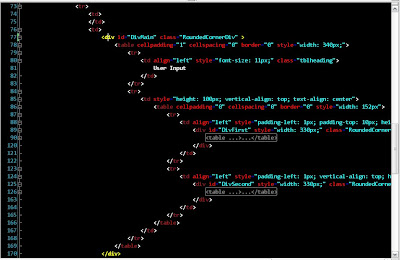
and i have write the code to create the divs here is example code image i have only shown the div tag and there properties settings.

from the image you can see i have created outer div which contain two divs.The java script to round the corner of the inner div and the bottom corner of the outer div is as below.
function OnloadFunction()
{
settings = {
tl: { radius: 7 },
tr: { radius: 7 },
bl: { radius: 7 },
br: { radius: 7 },
antiAlias: true,
autoPad: true
};
MainDivsettings = {
tl:false,
tr:false,
bl: { radius: 5 },
br: { radius: 5 },
antiAlias: true,
autoPad: false
};
var DivFirst=document.getElementById('DivFirst');
var DivSecond= document.getElementById("DivSecond");
var DivMain = document.getElementById("DivMain");
var DivFirst = new curvyCorners(settings, DivFirst);
DivFirst.applyCornersToAll();
var DivSecond= new curvyCorners(settings,DivSecond);
DivSecond.applyCornersToAll();
var DivMain= new curvyCorners(MainDivsettings,DivMain);
DivMain.applyCornersToAll();
}
The Settings
The first part of the previous example creates a variable called settings, you can change this to any variable name you want, you will need to use this variable later on in the script. This variable holds all the settings needed for the curvyCorners object to work. Each line of the settings object is a particular setting, for example the first line tl: { radius: 7 }, tells the script that you want the top right corner of your box to have a 7 pixel corner radius. The next three lines set the radiuses for the other three corners.
if you don't want the corner to be rounded and the corner remain the square then you can set that corner value to be false. In the example javascript code i don't want the top right and top left corner of the outer div to be rounded so replace the bracketed section to the right of each colon (:) with the keyword false. See example the MainDivsettings in the above code.
Anti-Aliasing?
Changing the value of antiAlias from true to false will toggle the anti-aliasing. Turning off anti-aliasing will reduce the smoothness of the corners but will greatly increase the rendering time required to draw the corners.
Padding?
The last setting is called autoPad. Again this can be set to either true or false. By default and DIVs that make use of the curvyCorners can't have padding applied. This is because the padding messes up the corners that curvyCorners generates.
you can find more detail about how to use curvy corner by clicking here
the css class i have used for my code example is
.RoundedCornerDiv
{
border: #6593cf 1px solid;
padding: 2px 2px 2px 2px;
margin: 0px auto;
color: #000;
background-color: #f1f5fa;
}
and the output of my example is as below
Enjoy rounded corner box without images :)

2 comments:
hmm, good effort yar,one thing i want to confirm from you is that have u tested that on Fire Fox as well?
for IE there is easy soltion to it as well using the "legend" Tag.
http://www.w3schools.com/TAGS/tag_fieldset.asp
Tasleem: for you i have upload image above and you can see the out put is even better then IE
Post a Comment